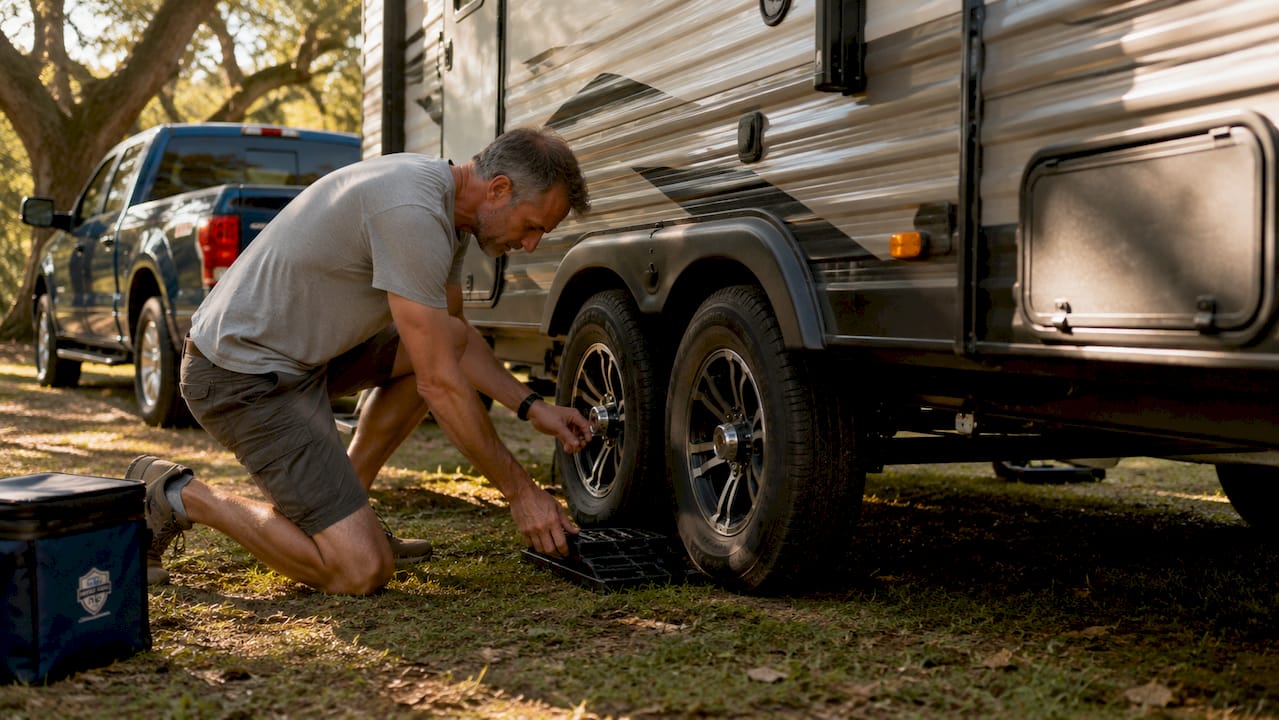
Leveling a travel trailer is the process of making your rig horizontally and longitudinally flat so every system inside works as designed. Get it wrong, and your refrigerator stops cooling properly, your doors swing open on their own, and your plumbing drains backward. Get it right, and your campsite feels like home. The industry distinguishes between two separate tasks: leveling, which corrects tilt using blocks and the tongue jack, and stabilizing, which reduces sway once the trailer is already level. Confusing the two is the most common and costly mistake trailer owners make.
What tools and equipment do you need for leveling a travel trailer?
Arriving at a campsite without the right gear turns a 20-minute setup into an hour of frustration. Gather these tools before you leave the driveway.
- Leveling blocks or ramps. Interlocking plastic blocks are the standard choice. Modern leveling blocks support static loads over 30,000 pounds, making them safe for travel trailers on dirt, gravel, and grass alike.
- Bubble level or digital level. A simple bubble level placed inside the trailer near the center gives you an accurate read. Visual estimation is unreliable because terrain creates optical illusions that fool even experienced campers.
- Wheel chocks. Standard rubber or plastic chocks go on both sides of each tire. X-chocks, which expand between dual tires, add extra resistance to rolling.
- Tongue jack with a jack pad. Your tongue jack handles front-to-back adjustment. A jack pad under the foot spreads the load and prevents sinking on soft ground.
- Stabilizer jacks with jack pads. These go down last, after leveling is complete. They reduce sway and vibration. They do not level the trailer.
| Tool | Primary purpose | Used before or after unhitching? |
|---|---|---|
| Leveling blocks | Correct side-to-side tilt | Before unhitching |
| Bubble or digital level | Confirm accurate level | Both stages |
| Wheel chocks | Prevent rolling | Before unhitching |
| Tongue jack | Correct front-to-back tilt | After unhitching |
| Stabilizer jacks | Reduce sway and bounce | After leveling |
Pro Tip: Tape a small bubble level permanently to a cabinet shelf inside your trailer. You will always have an accurate reference without digging through your gear bin.
How do you level a travel trailer step by step?
Proper trailer leveling follows a strict two-stage sequence: side-to-side first, then front-to-back. Skipping steps or reversing the order forces you to start over and risks equipment damage.
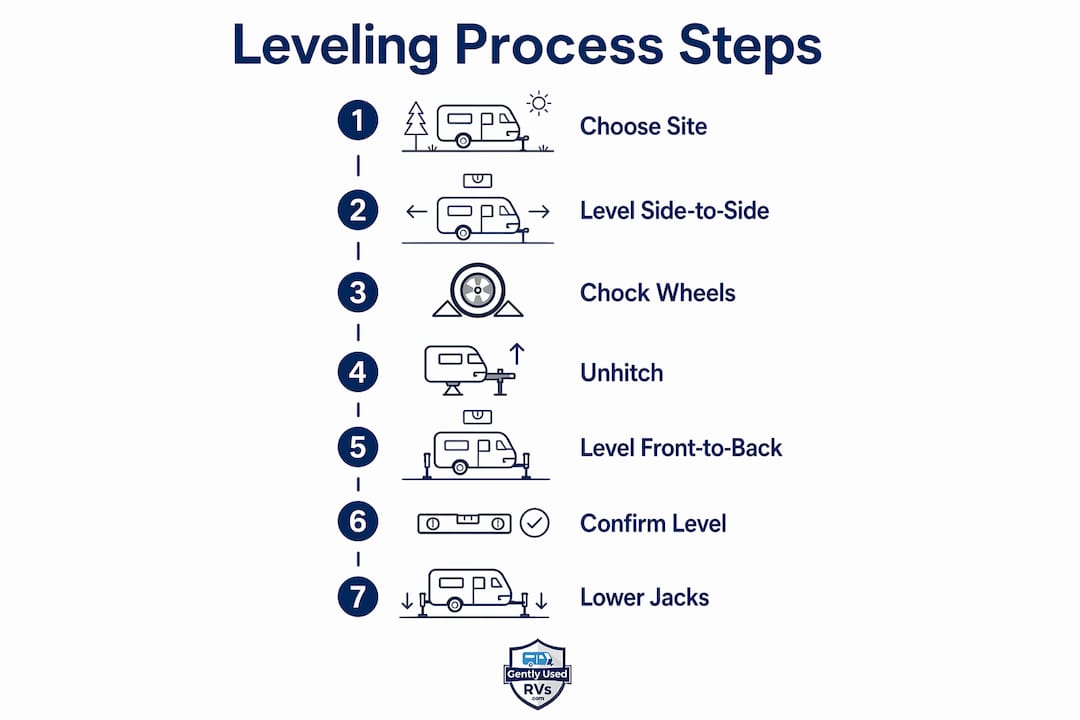
Step 1: Choose your site carefully
Pick the flattest spot available with good drainage. Water pooling under your trailer causes long-term frame and floor damage. Walk the site before you pull in and note which side sits lower.
Step 2: Level side to side while still hitched
Drive slowly onto leveling blocks placed under the tires on the lower side. Keep the trailer hitched to your tow vehicle during this step. The hitch connection keeps the trailer from rolling while you adjust. Check your bubble level after each small move.
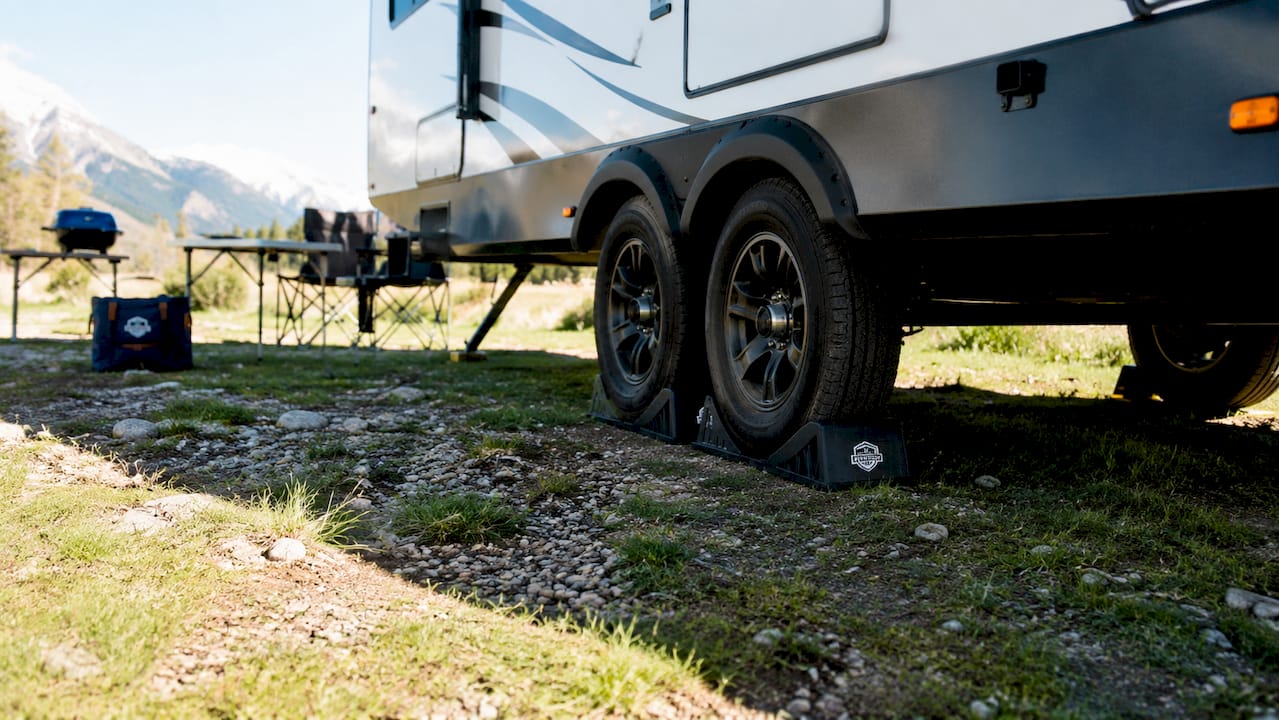
Step 3: Chock the wheels before anything else
Once the trailer reads level side to side, place wheel chocks firmly against both sides of each tire. This step is non-negotiable. A trailer that rolls while you are unhitching can cause serious injury or damage.
Step 4: Unhitch and adjust front to back
Disconnect from your tow vehicle only after the wheels are chocked. Use the tongue jack to raise or lower the front of the trailer until the level reads flat front to back. Accurate level readings inside the trailer account for frame flex and give you a direct measure of how appliances and slide-outs will actually function.
Step 5: Confirm with your interior level
Walk inside and check the bubble level near the center of the trailer. This is your final authority. The ground outside can look flat while the trailer still reads off. Adjust the tongue jack in small increments until the bubble sits centered in both directions.
Step 6: Lower the stabilizer jacks
Stabilizer jacks reduce movement and sway once the trailer is level, but they do not contribute to leveling accuracy. Extend them until they just touch the ground, then add only a quarter to a half turn of pressure. Over-tightening bends mounting brackets and cracks welds without improving stability.
Pro Tip: If your tongue jack struggles on soft ground, place a wide rubber or composite jack pad under the foot before you start cranking. A pad that is at least 10 inches square distributes the load and prevents the jack from sinking mid-adjustment.
Precise leveling often requires iterative adjustment. Estimating block height or tongue jack extension without regular level checks increases setup time and errors. Check the level after every adjustment, not just at the end.
How do you level a travel trailer on uneven or soft ground?
Off-grid and natural terrain sites present challenges that a paved campground never does. The ground shifts, compresses, and settles under your trailer’s weight over time.
Load-spreading pads under leveling blocks and stabilizer jack feet prevent sinking in soft ground and maintain leveling accuracy across multi-day stays. Without pads, blocks can tilt or sink unevenly, throwing your whole setup off.
- Assess soil firmness before you park. Press your heel firmly into the ground. If it sinks more than an inch, treat the site as soft ground and use pads under every contact point.
- Stack blocks to a safe height. The practical safe limit for stacked leveling blocks is 4 inches of height. Beyond that, the stack becomes unstable under the trailer’s weight. If you need more correction than 4 inches, look for a different parking spot or use a purpose-built ramp designed for greater height.
- Use jack pads under the tongue jack. Jack pads under the tongue jack prevent sinking and improve front-to-back stability, especially on heavier trailers or loose soil.
- Recheck your level every morning on multi-day stays. Ground settling during extended stays is real, especially after rain or temperature swings. A trailer that was perfectly level on day one can read noticeably off by day three.
| Ground type | Key risk | Best practice |
|---|---|---|
| Soft grass or dirt | Sinking blocks and jacks | Use wide load-spreading pads under all contact points |
| Gravel | Block shifting | Compact gravel before placing blocks |
| Sand | Rapid sinking | Use the largest pads available; recheck level frequently |
| Paved or concrete | Minimal risk | Standard blocks without pads are usually sufficient |
Pro Tip: Carry a small piece of plywood (at least 3/4 inch thick and 12 inches square) as a backup pad. It works on any terrain and costs almost nothing.
What mistakes should you avoid when leveling a travel trailer?
Most leveling problems trace back to a handful of repeatable errors. Knowing them in advance saves you time, money, and a very uncomfortable night.
- Never use stabilizer jacks to lift or level the trailer. Using stabilizers as lifting devices bends mounting brackets, cracks welds, and warps the chassis. Stabilizers are designed only to resist sway and vibration once the trailer is already level.
- Always level side to side before front to back. Reversing the order means your front-to-back adjustment changes your side-to-side reading. You end up chasing your tail through multiple correction cycles.
- Chock wheels before unhitching. Skipping this step is a safety hazard. A trailer on a slight slope can roll the moment you disconnect the hitch.
- Never eyeball the level. Even minor side-to-side tilt causes operational issues with doors, refrigerators, and plumbing due to uneven chemical flow and drainage. Your eyes cannot detect a half-degree tilt. Your bubble level can.
- Do not ignore signs of poor leveling. Doors that swing open or closed on their own, a refrigerator that runs warm, slow or stagnant drain lines, and a floor that feels tilted underfoot all point to a leveling problem that needs correction.
The most critical misconception is treating stabilizing as synonymous with leveling. Stabilizer jacks do not level a trailer. They never have. Using them that way damages your frame and leaves you unlevel anyway.
Key Takeaways
Leveling a travel trailer correctly requires a strict side-to-side first, front-to-back second sequence using leveling blocks, wheel chocks, and the tongue jack before stabilizer jacks ever touch the ground.
| Point | Details |
|---|---|
| Sequence matters | Always level side to side first, then front to back, to avoid repeated corrections. |
| Stabilizers are not levelers | Stabilizer jacks reduce sway only; using them to lift the trailer damages the frame. |
| Use a level inside the trailer | Interior bubble or digital levels give the most accurate reading of actual living conditions. |
| Soft ground needs pads | Load-spreading pads under blocks and jacks prevent sinking and maintain accuracy over time. |
| Recheck on long stays | Ground settling shifts your level over days, especially after rain or temperature changes. |
Why I think most campers rush the one step that matters most
After years of watching trailer setups at campgrounds from the Rockies to the Florida coast, the pattern is always the same. Owners nail the side-to-side adjustment, then rush the front-to-back step because they are tired from the drive. They skip the interior level check, drop the stabilizers, and call it done. Two hours later, the refrigerator is struggling and the bathroom door keeps drifting open.
The interior level check is the step that actually tells you whether your appliances will work tonight. The ground outside lies to you. The bubble inside the trailer does not. I have seen owners spend 45 minutes adjusting blocks outside while the interior level showed they were already perfect after the first move. Checking inside first would have saved them the whole ordeal.
Invest in a quality digital level if you camp frequently. A good digital level reads to a tenth of a degree and removes all guesswork. The cost is modest compared to a refrigerator repair caused by running it off-level for a season.
One more thing: re-check your level on day two of any multi-day stay. Soft ground compresses overnight. What was level at 6 PM may read a quarter inch off by morning. A quick tongue jack adjustment takes two minutes and keeps everything running right for the rest of the trip.
— Christopher
Ready to find a travel trailer that fits your camping style?
Choosing the right trailer makes leveling easier from the start. Lighter trailers need less block height. Models with electric tongue jacks speed up the front-to-back adjustment significantly. The right fit matters.

Gently Used RVs lists travel trailers of every size and weight class from private sellers and dealerships across the United States and Canada. Browse the full RV types guide to compare models by weight, length, and features before you buy. When you are ready to talk to a dealer in person, the RV dealer directory connects you with local experts who can walk you through leveling gear and setup requirements for any specific model. Find your next trailer at Gently Used RVs and get out there with confidence.
FAQ
What is the correct order for leveling a travel trailer?
Level side to side first while the trailer is still hitched, then chock the wheels, unhitch, and adjust front to back using the tongue jack. Reversing this order forces repeated corrections.
Can I use stabilizer jacks to level my trailer?
No. Stabilizer jacks are designed only to reduce sway and vibration after leveling is complete. Using them to lift or level the trailer bends mounting brackets and warps the chassis.
How do I know if my travel trailer is level enough?
Place a bubble level inside the trailer near the center and confirm it reads flat in both directions. Visual checks from outside are unreliable because terrain creates optical illusions.
How often should I recheck my level during a camping trip?
Recheck every morning on multi-day stays, especially on soft or natural terrain. Ground settling after rain or overnight temperature changes can shift your trailer off level by a noticeable amount.
What is the maximum safe height for stacked leveling blocks?
The practical safe limit is 4 inches of stacked block height. Beyond that, the stack becomes unstable under the trailer’s weight, and you should look for a flatter parking spot or use a purpose-built ramp.